Linking an AWS Account
Linking an AWS account allows you to execute rules on its resources. The account is linked by deploying a CloudFormation template that gives GorillaStack permission to execute actions on your behalf.
Firstly, you will be presented with the option to get started. At this point, you simply click Get Started to begin connecting your account.
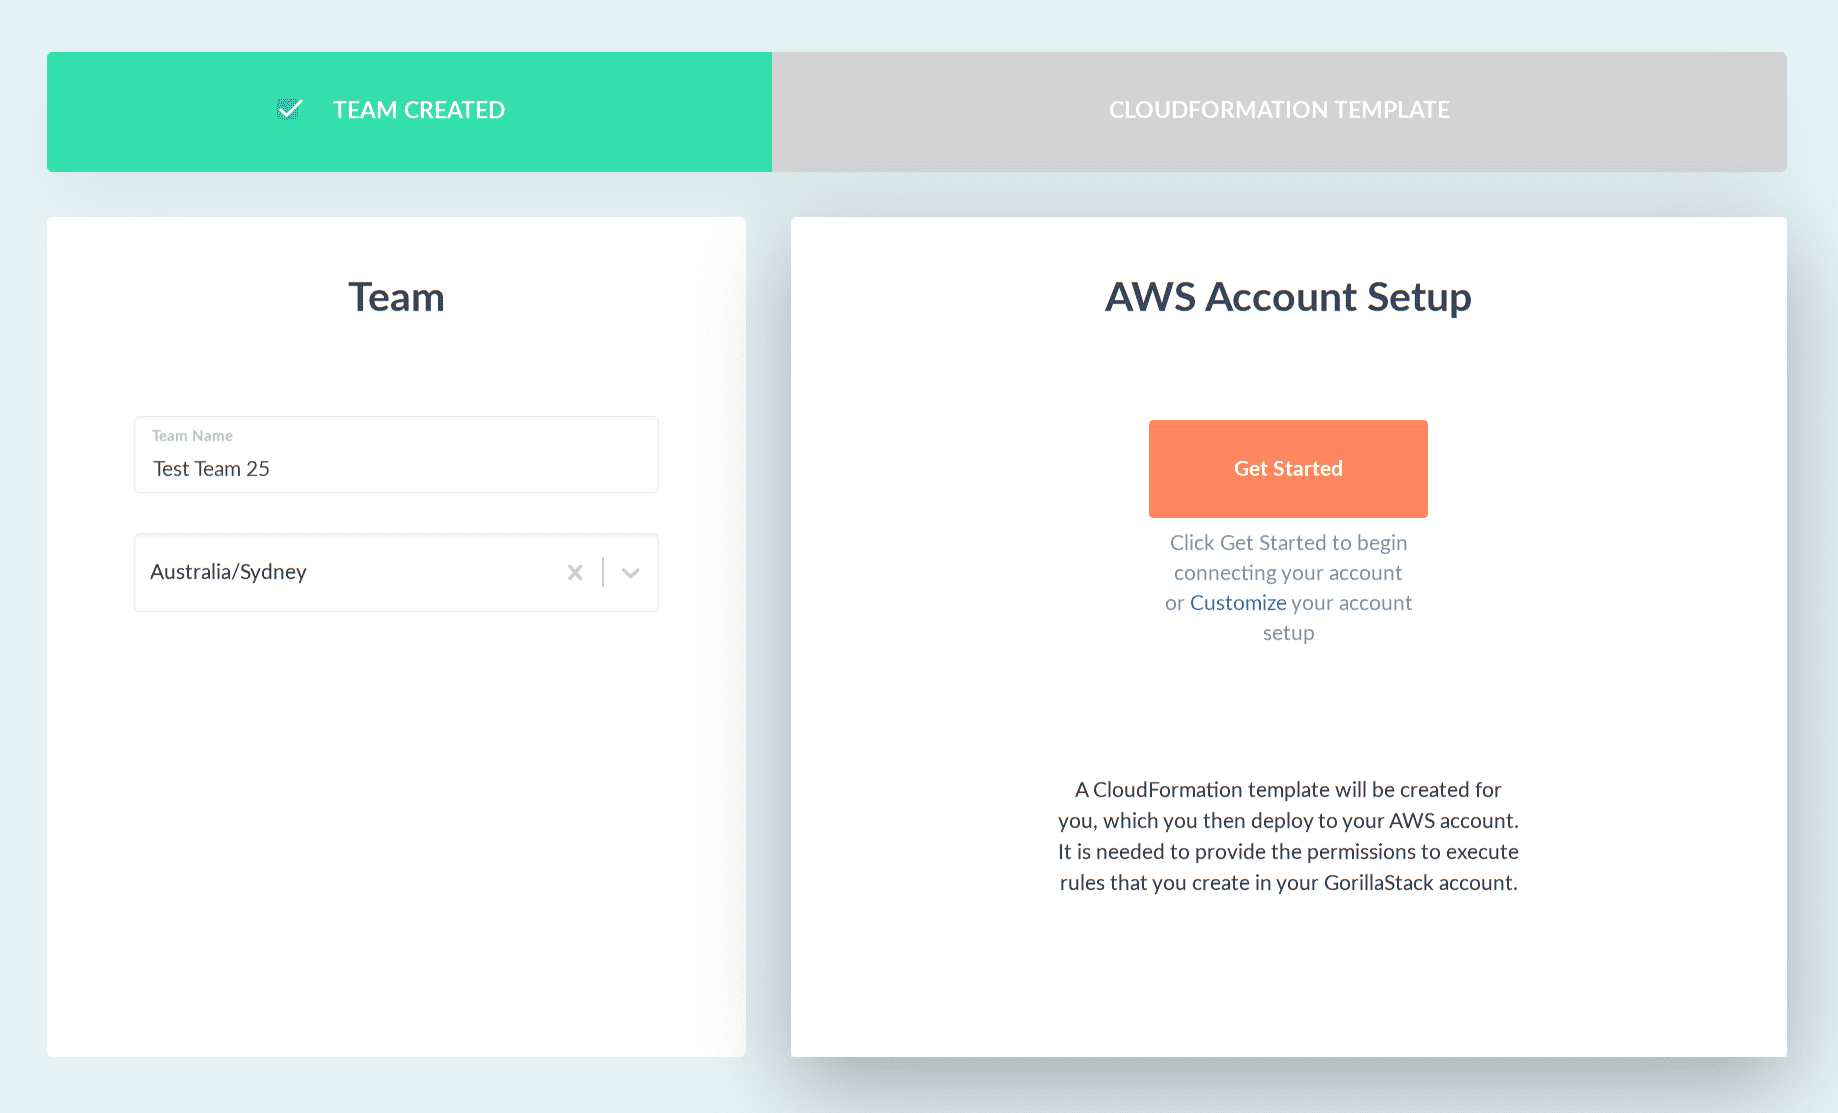
For more advanced control, you can select Customize if you wish to change the available features in your account (see Customizing your Account Setup for more information).
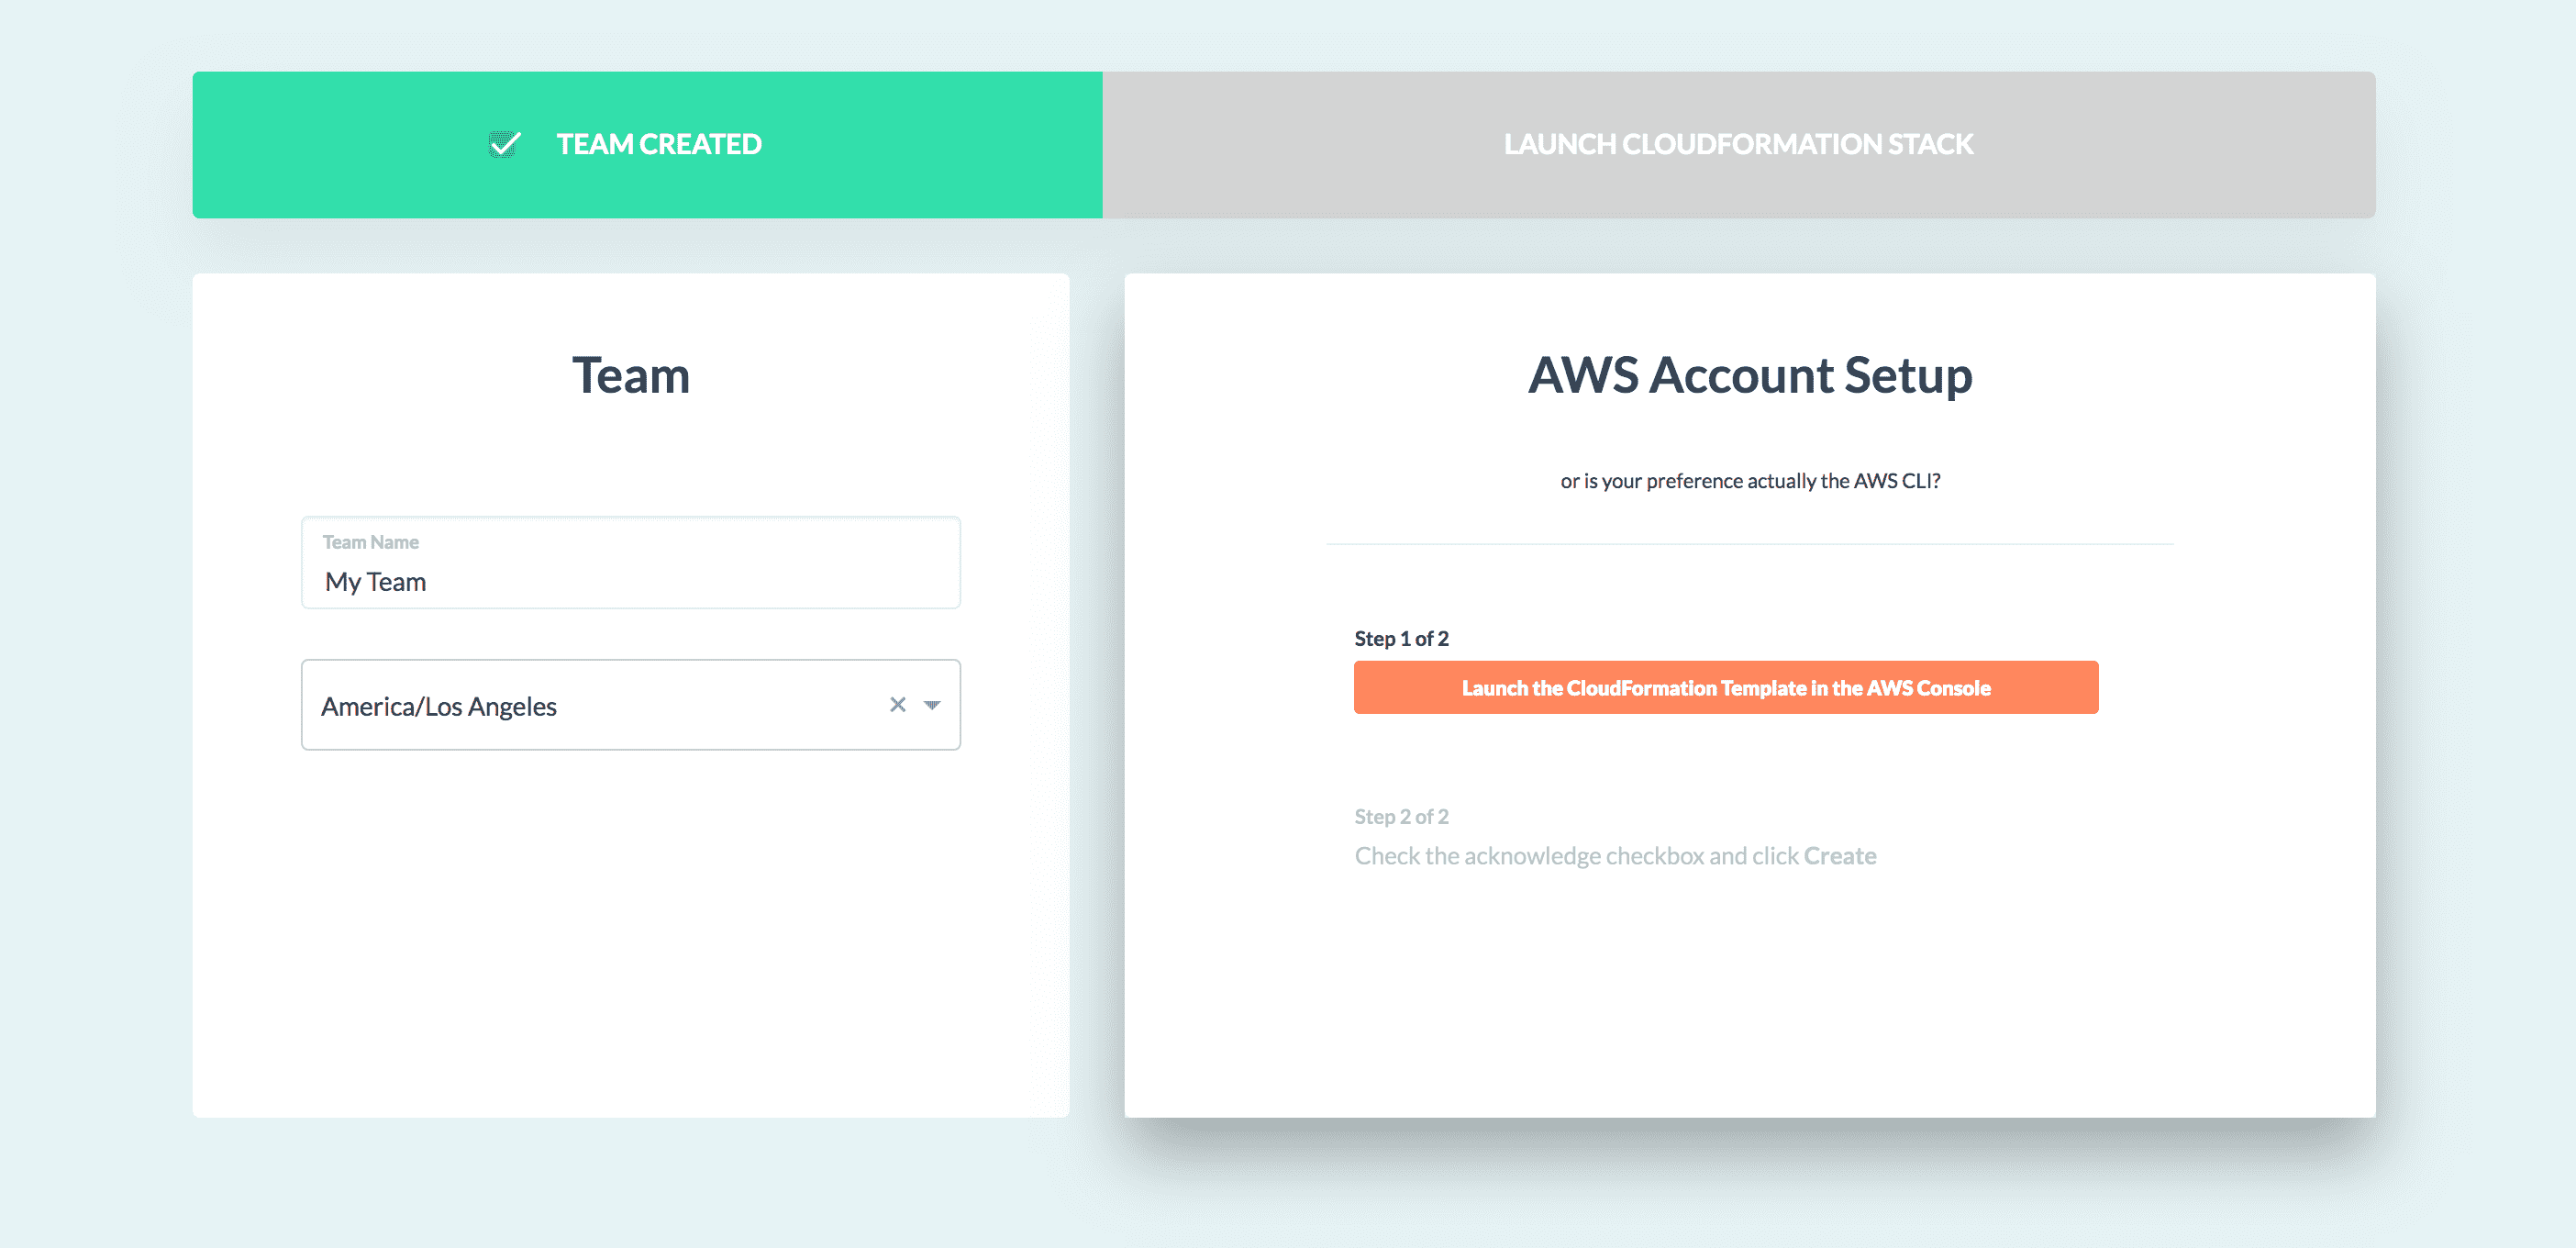
Once the template is prepared, you are presented with the option of connecting an AWS account when you login for the first time (shown in the screen below).
If you have an existing team, you can add another AWS Account by navigating to the Team drop-down (just to the right of the GorillaStack logo), selecting Platforms, then clicking the Add Account button.
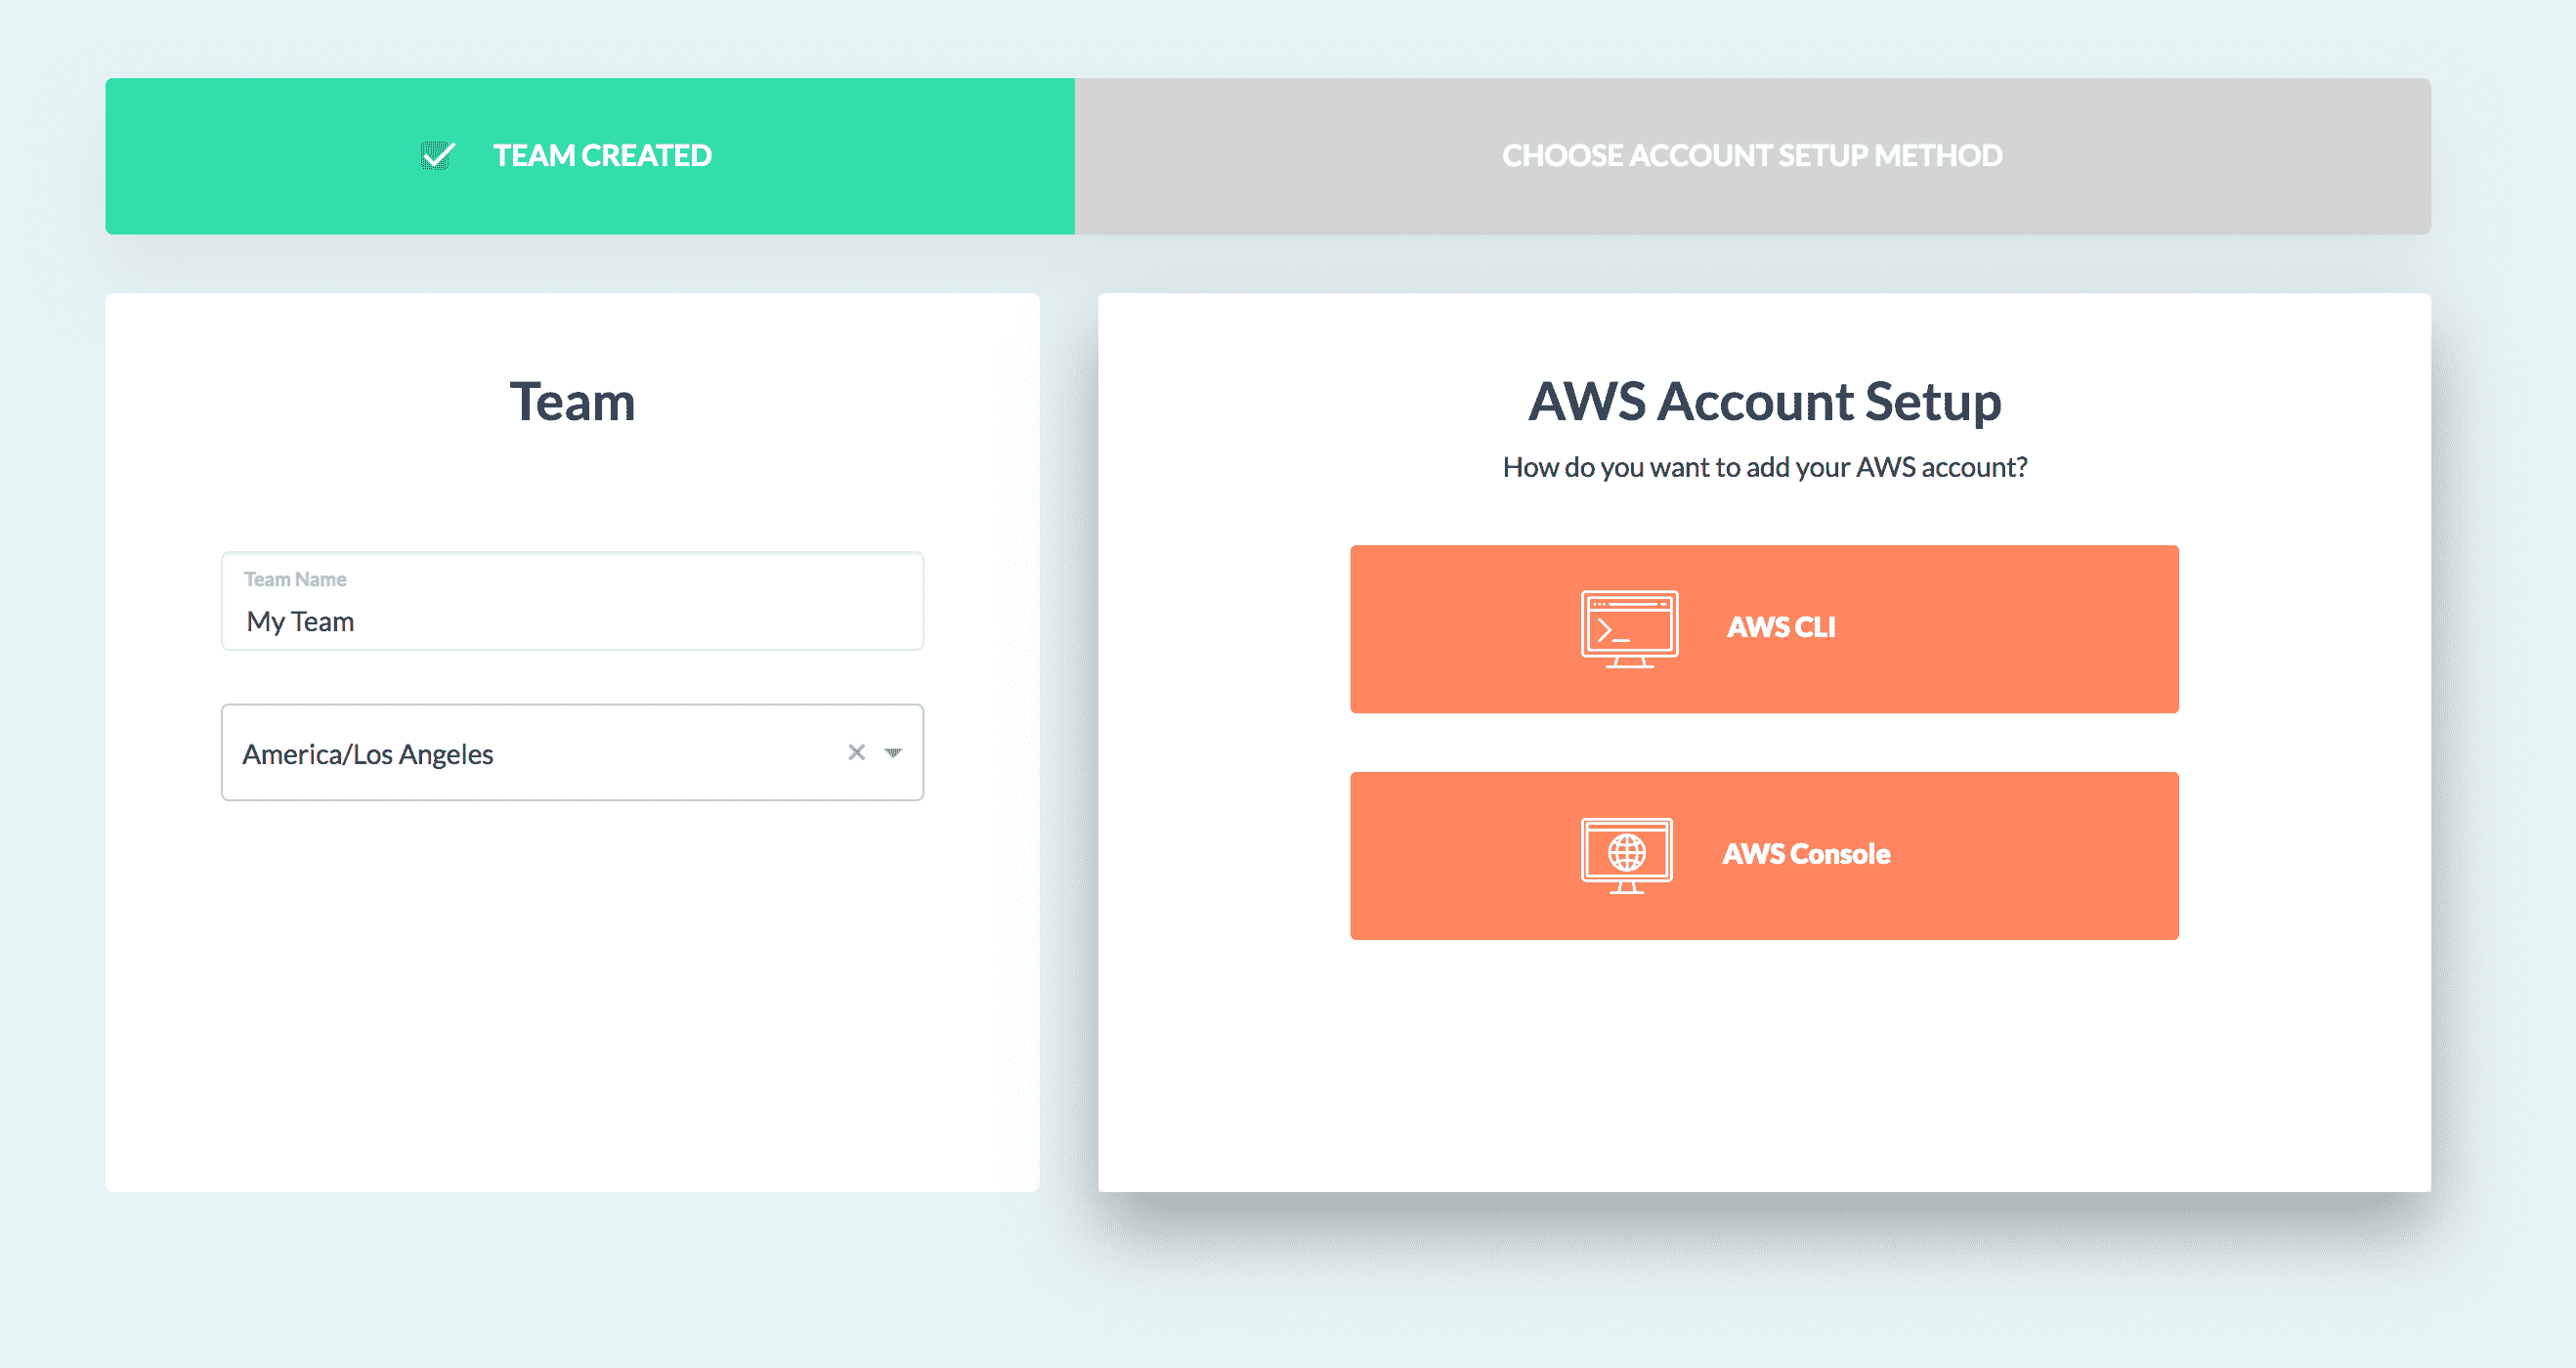
You will then be presented with the option to select setup from the AWS CLI or AWS Console. Each of these methods is detailed in the next section.
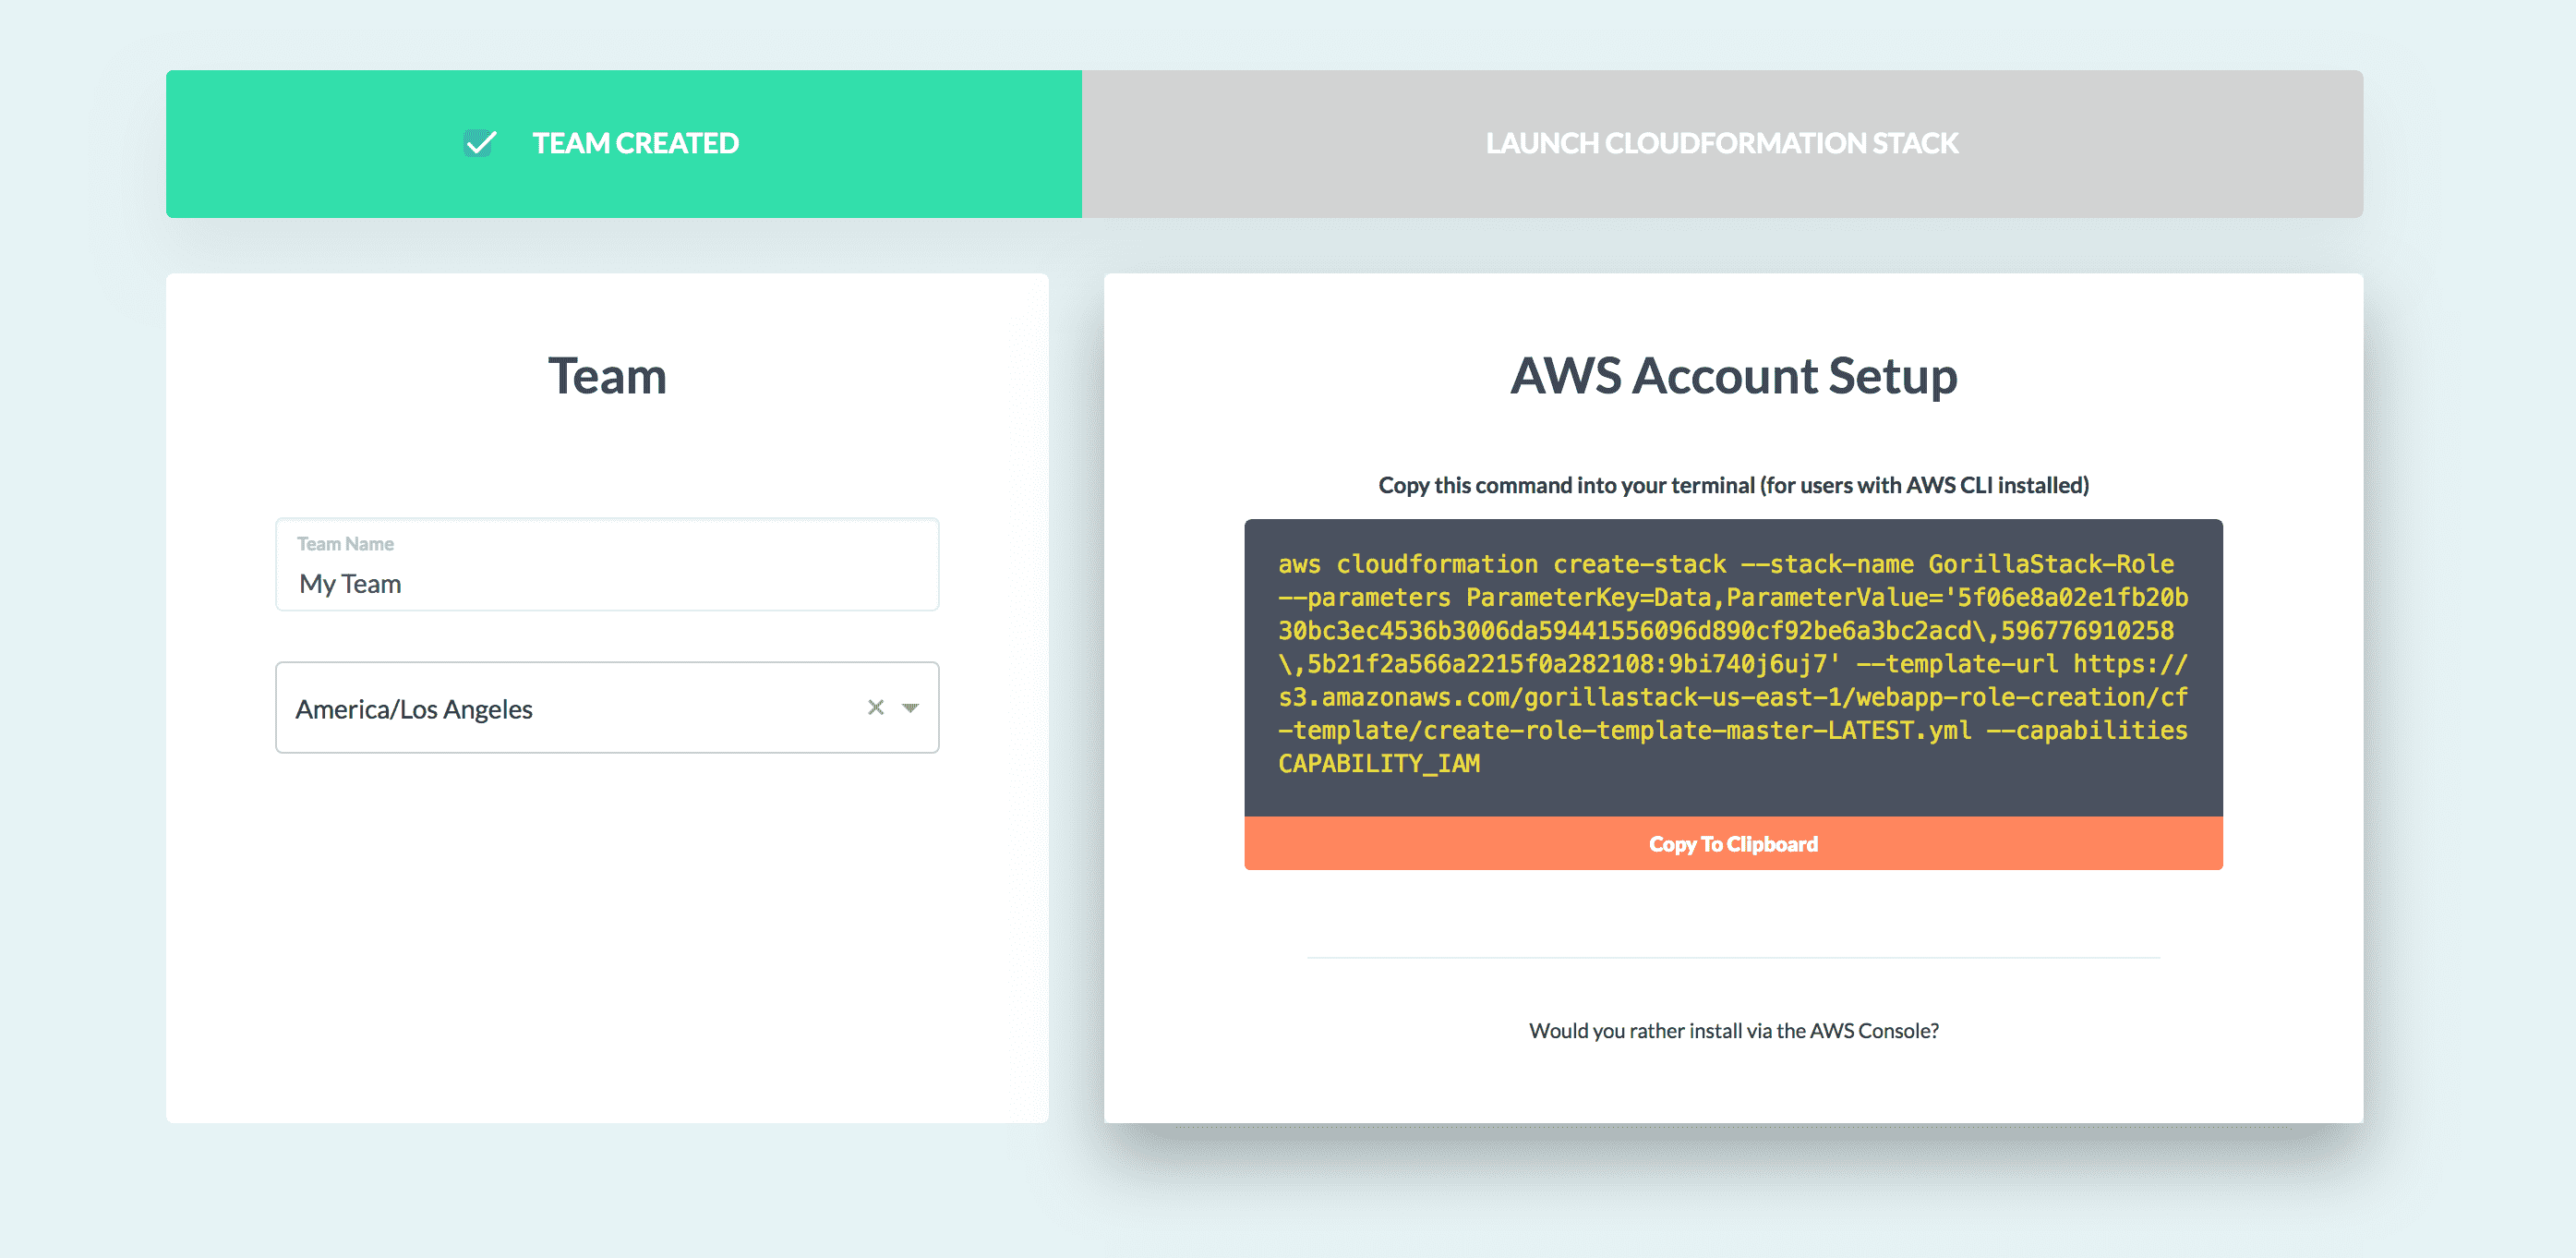
AWS CLI
Great news, you can use the AWS CLI to launch your CloudFormation stack to create the GorillaStack role for cross account access.
AWS_PROFILE variable to point
to the correct profile.
AWS Console
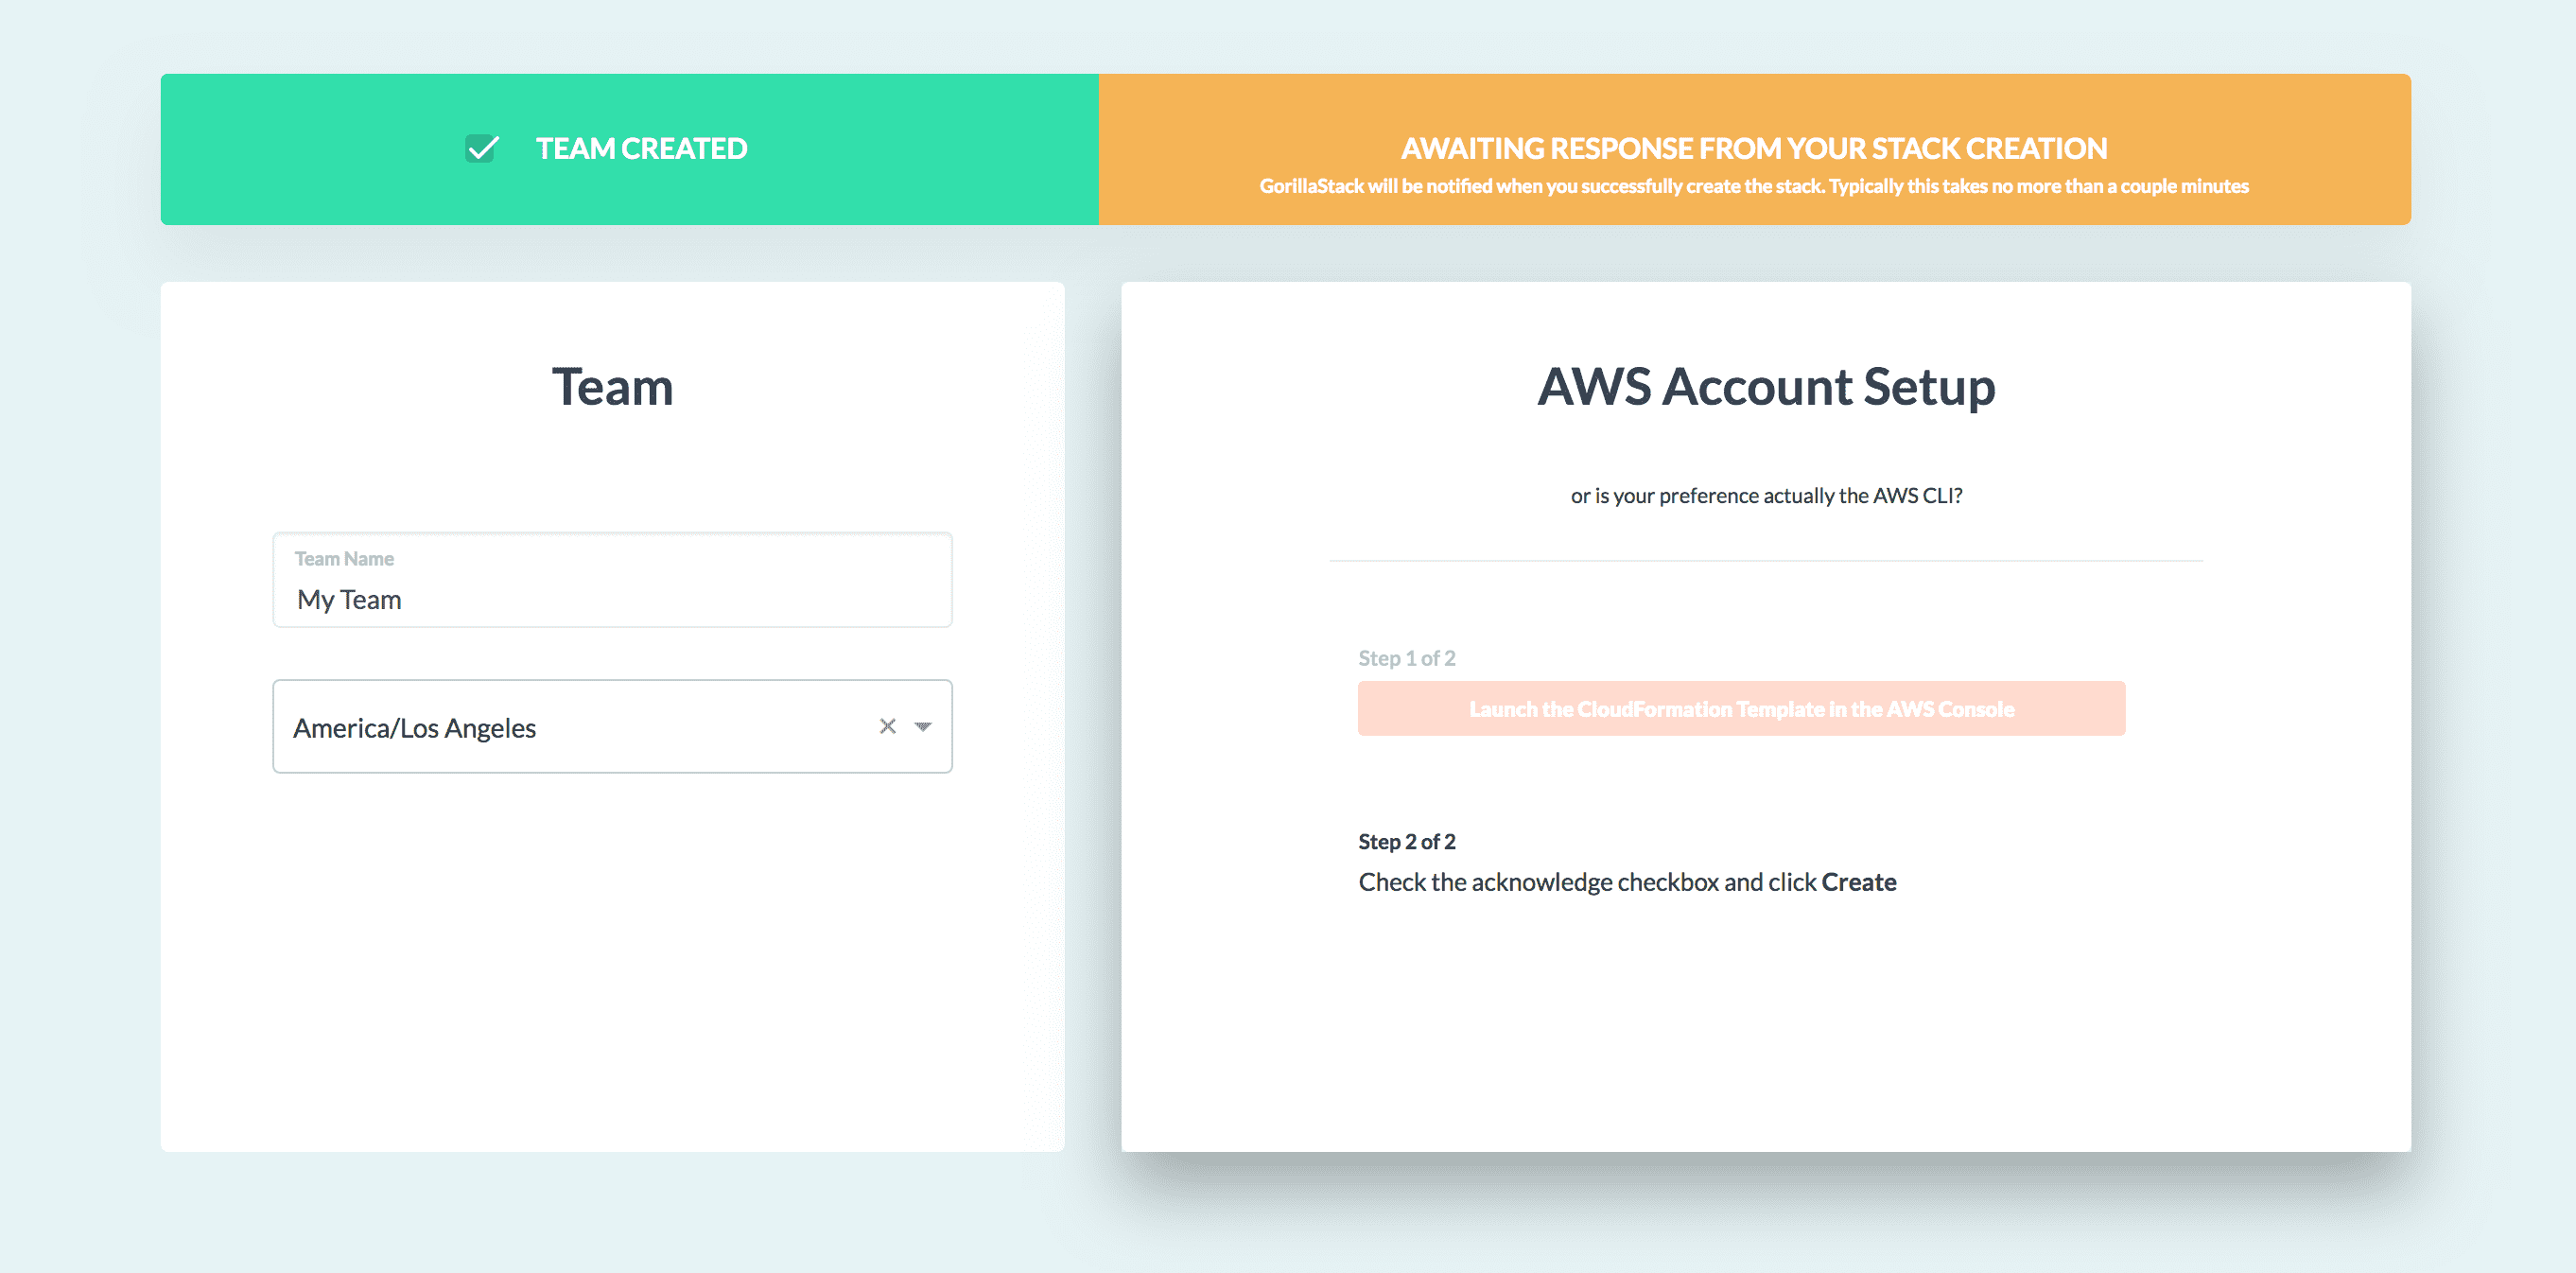
Not a fan of the AWS CLI? It's ok, you can launch the CloudFormation stack via the AWS Console.
Now, sit back and wait
We have a hook in the CloudFormation stack to hit our API with the ARN of the role for cross account access. When this comes through, we will mark this account onboarding process as complete.