Managing AWS Accounts
In this section we will explore:
Checking Account Status
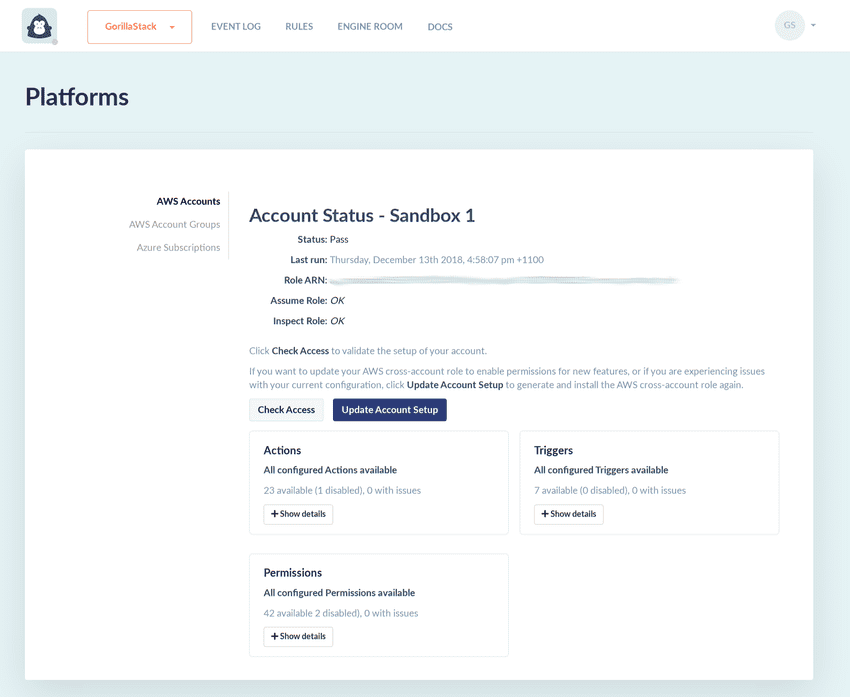
It is possible to view the configuration of accounts that created or updated from December 2018. The information you can view includes the Actions and Triggers that are enabled or disabled for that account, based on its CloudFormation template.
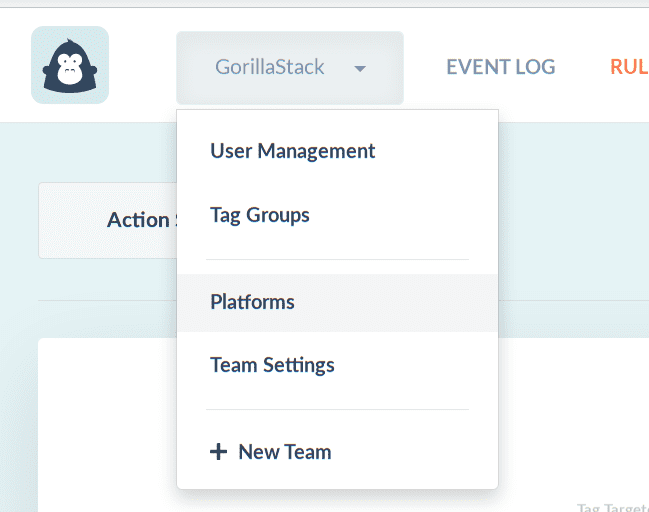
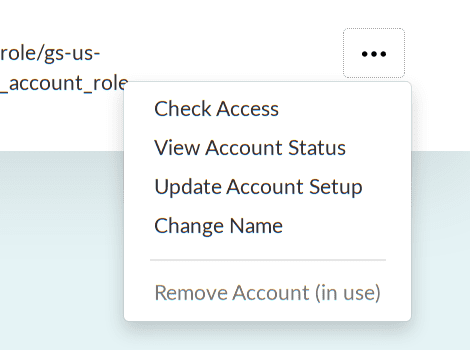
To view the Account Status, navigate to the Platforms view from the team drop-down menu, then select Account Status in the context menu next to the account name.
Your screen will look like above if your account was create or updated from December 2018. The Actions, Triggers and Permissions section can be expanded to view the full set of selected Actions and Triggers and the permissions they require in more detail.
Check Access
You can run an access check by clicking Check Access. This will confirm that the account has been linked correctly.
Update Account Setup
This can be used to update the account configuration e.g. to enable new Actions or disable other unwanted features. Read more in the section below.
Updating Account Setup
As GorillaStack releases new Actions and Triggers that you want to take advantage of, you will need to update your AWS account setup to link your account with the new permissions. You may also wish to "lock down" an Account by customizing the template to remove unwanted Actions and Trigger permissions.
In the past, this required updating the CloudFormation template by hand, but we now provide a guided workflow through the GorillaStack interface.
- Navigate to the Platforms view by clicking on your team name in the top bar and then selecting Platforms
- In the AWS Accounts tab, open the contextual menu next to the account and select Update Account Setup
-
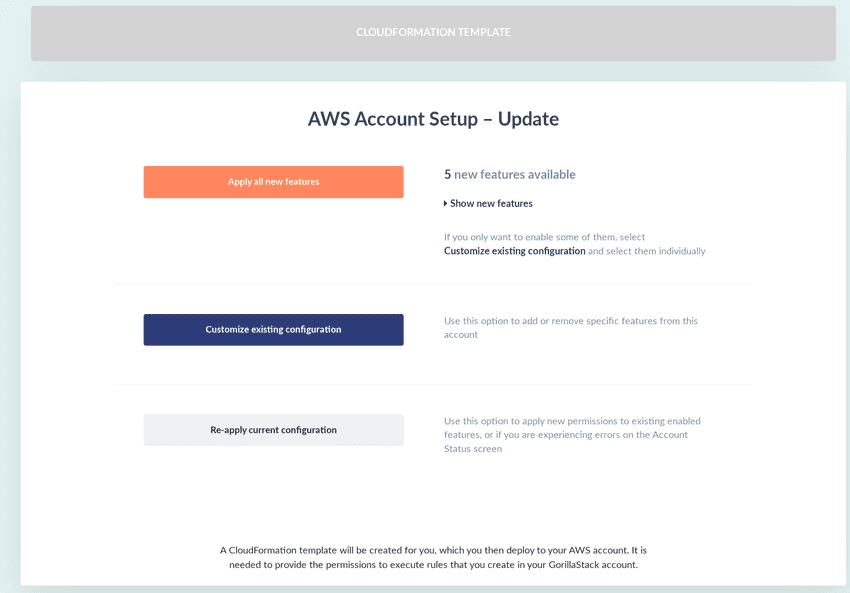
At this point, you'll be presented with the Account Setup process.
- Apply all new features - quickly update your account with all the new Actions or Triggers that have been added since you last updated your account (if you wish to select only certain new features, use the next option)
- Customize existing configuration - change the selected Actions or Triggers you have for your account (e.g. to enable a newly added Action, or to disable unused Actions). You can then proceed with account customization
- Re-apply current configuration - this button simply re-applies the current template. Use this when you don't want to change the current configuration, but either:
- an Action or Trigger has been updated with new functionality but it requires new optional permissions (we will note this in feature announcements); or,
- you need to fix a broken cross-account template.
-
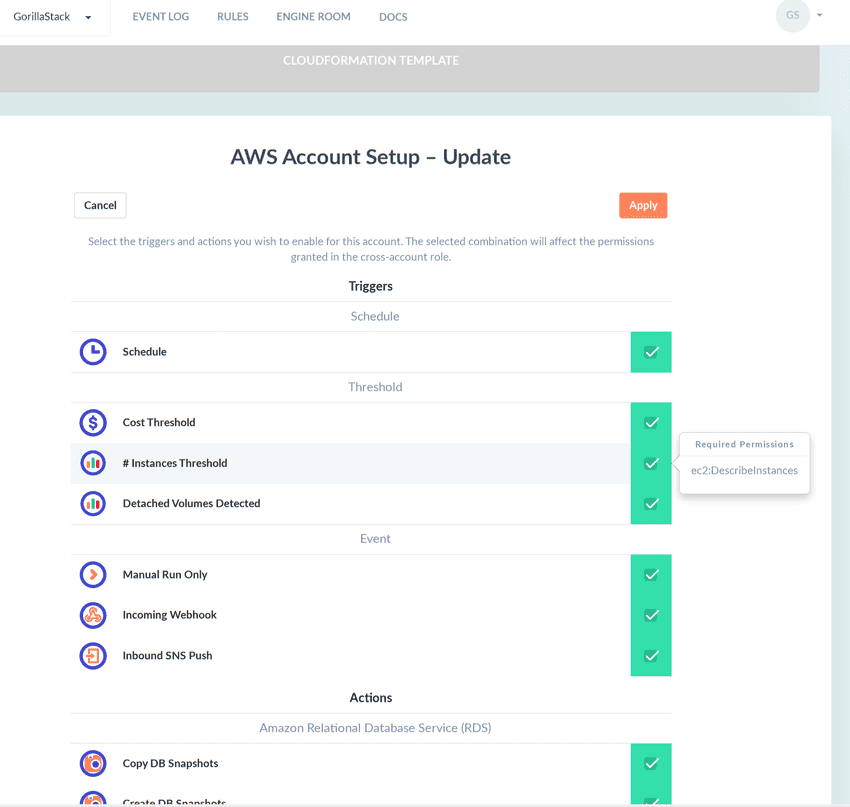
(customization) If you selected Customize existing configuration, you can select the Triggers and Actions you want to enable/disable. Select Apply to have GorillaStack generate a new template for you with your selected configuration.
(more information in Customize Account Setup)
-
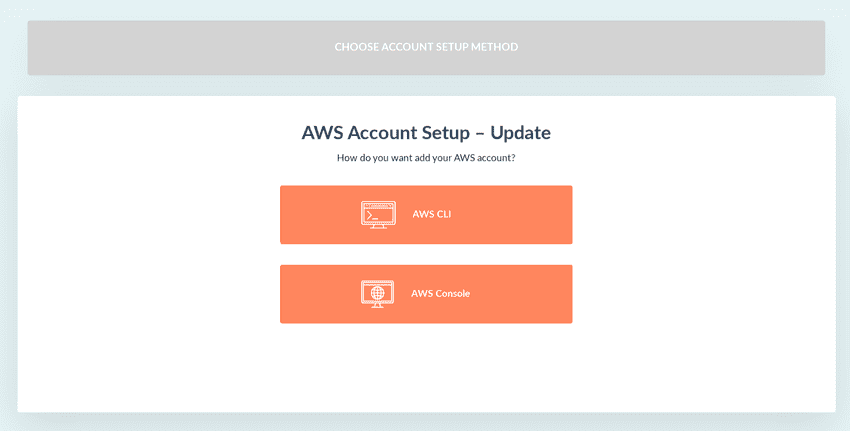
You will now be presented with the option of setting up via the CLI or the AWS Console.
If you are familiar with the CLI, this is the recommended option as you only need to copy-paste the commands
-
The instructions on the next step will depend on whether you are using GorillaStack's new generated templates
- older template (before December 2018): in the past a fixed CloudFormation template was provided to customers. This template can still be upgraded but it is recommended to use the CLI because of the number of steps required with the AWS Console to perform an update
- newer template: customers who have recently installed a CloudFormation template have a smoother update path. The newer (generated) templates allow GorillaStack to generate a Change Set in CloudFormation, which makes the update process a one-step click in the AWS Console (and a shorter CLI command)
- Once you've followed the instructions and applied the template update, you should be able to take advantage of the new features. You can confirm by running an access check from the Account Status page.
Customizing Account Setup
GorillaStack uses a cross-account role to connect your AWS Account to GorillaStack in order to run Rules, which is deployed using an AWS CloudFormation template.
We provide the option of customizing the template using the GorillaStack interface to restrict the available permissions to just the Actions and Triggers that you need (no CloudFormation knowledge needed!). This can be done on first-time Account Setup, or by updating the setup for already linked accounts.
The default template contains the permissions needed for all the Triggers and Actions in GorillaStack. These permissions may cover AWS services that you do not use, but in order to maintain 'the principle of least privilege', you may wish to remove the unwanted ones.
Another reason for customizing the template is to add new GorillaStack features to an existing Account Setup - this needs to be done so that the new IAM permissions are enabled for GorillaStack to run the feature in your AWS Account.
If you are first time user of GorillaStack, it's best to stay with the default setup (especially on test accounts) so you can try out the full set of Triggers and Actions. Once you are familiar with all the provided features, customizing the template is recommended so that you can declutter the Rules interface and maintain a 'principle of least privilege'.
-
New Accounts
During Account Setup, select the Customize link to begin the customization process.
-
Existing Accounts
If you've already installed GorillaStack, see the Updating Account Setup section for getting started.
Customization
Once you've selected Customize from the setup process, you'll be given the option of selecting which Triggers and Actions you want to include.
- Any new features will be highlighted.
- If you hover over a Trigger or Action, the required IAM permissions will be listed.
Once you're done, click the Apply button to continue with the create/update process, following the prompts to install or update the template in your AWS Account. GorillaStack will generate a new template with your customized account configuration.
